FAQs

The KLOVER MiK 09 requires an omnidirectional lapel (lavaliere) microphone. Omni-directional microphones capture sound from a 360-degree pattern around the microphone. This pickup pattern allows these microphones to capture the sound energy reflected from the outer edges of the parabolic dish. This sound energy may be ignored with a more directional pickup pattern.
Each parabolic microphone has a specific focus point. The microphone element must be placed at this focus point in order to provide the maximum performance from the unit. The focus point of the KLOVER MiK 09 is 1 1/8″ behind (inside) the rear surface of the aluminum frame. The square tab at the bottom of the dish can be used as a setup guide if it is 1 1/8″ wide.
Please refer to the video in the “Assembly Video” for a detailed explanation of the focusing process.
Please see the dimensions in the “Specifications” page.
Please see the dimensions in the “Specifications” page.
No. We have designed all the Klover MiK products to take the abuse of everyday use. The only critical portion of the Klover MiK is the inside surface of the parabolic dish. We suggest transporting the Klover MiK 09 with the dish attached to the aluminum frame to reduce any chance of scratching the inside surface of the dish. Using a case or carrying bag for additional protection when transporting our parabolic microphones is also suggested.
The KLOVER MiK 16 requires a microphone with an omnidirectional or wide-cardioid pickup pattern. A small diaphragm condenser (pencil) mic may be used between 3/4 and 7/8 inches in diameter. In addition, a lapel (lavaliere) microphone up to 5/16 inches in diameter may be used with the included mic adapter tube.
Omnidirectional microphones capture sound from a 360-degree pattern around the microphone. Wide-cardioid microphones have a pickup pattern that goes beyond 180 degrees. Both of these microphones capture the sound energy reflected from the outer edges of the parabolic dish. This sound energy may be ignored with a more directional pickup pattern.
Each parabolic microphone has a specific focus point. The microphone element must be placed at this focus point to provide maximum performance from the unit. The focus point of the KLOVER MiK 16 is 1-1/8 inches behind (inside) the rear surface of the mic mount hub or 1-1/2 inches behind the front face of the collector dish.
A label on the face of the collector dish includes a line that is 1-1/8 inches wide for adjusting the focus.
Please refer to the video in the “Assembly Video” for a detailed explanation of the focusing process.
Please see the dimensions in the “Specifications” page.
Please find the product weight in the “Specifications” page.
The KLOVER MiK 16 is shipped with an “adapter tube” that fits inside the center hub of the microphone yoke and has an inside diameter that is significantly smaller. The most common method of mounting a lapel microphone inside this tube is to wrap the mic cable with soft foam rubber before locating the mic inside the tube. When the foam expands, it centers and retains the mic.
We are currently shipping a plastic microphone clip that snaps on the outside of the lapel microphone and then slips inside the adapter tube.
No. The four models of the KLOVER MiK 16 are functionally equivalent. The way that the dish is supported is the only physical difference.
The KLOVER MiK 26 requires a microphone with an omnidirectional pickup pattern. A small diaphragm condenser (pencil) mic may be used between 3/4 and 7/8 inches in diameter. In addition, a lapel (lavaliere) microphone up to 5/16 inches in diameter may be used with the included mic adapter tube.
Omnidirectional microphones capture sound from a 360-degree pattern around the microphone. This allows them to capture the sound energy reflected from the outer edges of the parabolic dish. This sound energy may be ignored with a more directional pickup pattern.
Each parabolic microphone has a specific focus point. The microphone element must be placed at this focus point to provide the maximum performance from the unit. The focus point of the KLOVER MiK 26 is 2-1/4 inches behind (inside) the rear surface of the mic mount hub or 4 inches behind the front face of the collector dish.
A label on the face of the collector dish includes a line that is 2-1/4 inches wide for adjusting the focus.
Please refer to the video in the “Assembly Video” for a detailed explanation of the focusing process.
Please see the dimensions in the “Specifications” page.
Please find the product weight in the “Specifications” page.
The KLOVER MiK 26 is shipped with an “adapter tube” that fits inside the center hub of the microphone yoke and has an inside diameter that is significantly smaller. The most common method of mounting a lapel microphone inside this tube is to wrap the mic cable with soft foam rubber before locating the mic inside the tube. When the foam expands, it centers and retains the mic.
We are currently shipping a plastic microphone clip that snaps on the outside of the lapel microphone and then slips inside the adapter tube
No. These two models are functionally equivalent. The only difference between the two models is the shape of the flat flange on the front surface of the parabolic dish. The shape of the “TE” model allows the dish to be rotated slightly to fit within a waterproof (Pelican style) shipping case. It also allows the unit to fit in a slightly smaller shipping container, which reduces its shipping cost.
The Big Ears, which has been widely used for many years, did not provide a true parabolic dish. The dish was more similar to a hemisphere than a parabola.
This shape provided a wider, less focused pickup pattern than a dish with a true parabolic. This shape also provides less defined, less crisp audio.
Some operators will notice the flexibility of the handles. This flexibility is the result of our patented construction method that isolates the handles from the dish itself. Products that mount the handles directly to the plastic dish often generate unwanted noise from the movement of the handles. The isolation of the handles from the dish allows the handles to move slightly but keeps any stress placed on the handles from being transferred to the plastic dish, which would cause the dish to create noises such as creaks and pops. While it may initially seem uncomfortable to operators accustomed to the older design, they adjust quickly.
The microphone yoke (support bar) is also isolated from the dish to eliminate any noise created by the movement of the mic yoke.
First, carbon fiber is very light and strong. Second, and more importantly, when a carbon fiber tube breaks, it turns into small weak strands. Handles made from PVC are strong, but when they do break, they create very sharp, jagged edges, which basically create a spear. Handles made from metal tubes or plates are so strong that they will not bend or fail until they have done serious injury to the operator or athlete that may have collided with them.
Parabolic microphones are involved in many collisions during the course of a sports season. We take the safety of operators and athletes very seriously and have done all we can to provide the safest products possible.
If the KLOVER MiK 26 will be stationary for long periods of time, we suggest the use of one of our mounting accessories. The Monopod Mount replaces the rear crossbar of the handle assembly. It allows the entire unit to be mounted on top of a tripod or monopod while still allowing the unit to be aimed by the operator.
We also offer a pole-mounted version of the KLOVER MiK 26 for permanent installations. This custom version replaces the handle assembly with brackets that will mount the dish to a pole while allowing for adjustment about the horizontal and vertical axes.
Our first recommendation is to mount the KLOVER MiK on top of a monopod by replacing the rear crossbar of the handle assembly with a Monopod Mount. Placing the KLOVER MiK on top of a monopod takes the weight of the parabolic off of the operator’s shoulders and allows the operator to simply “point” the parabolic in the proper direction. We feel this also improves the operator’s safety as the operator can simply let the parabolic fall to the ground if a collision with a player is imminent, instead of having to run from the collision with the parabolic still around their neck.
A second option, though untested, is to combine the proper use of the neck strap, as demonstrated in the “Proper Operation” video (under “Assembly Videos”), along with the use of a Bicep Curl Belt to provide support for the operator’s elbows.
The ideal distance for a shotgun microphone from a speaker depends on several factors, but here are some general guidelines:
1. Typical range:
- Shotgun mics are usually effective from about 1 to 3 feet (30-90 cm) away from the speaker.
2. Optimal distance:
- For best results, aim for about 1 to 2 feet (30-60 cm) from the speaker's mouth.
3. Factors affecting distance:
- Room acoustics: In echo-prone spaces, closer is better.
- Background noise: More noise requires closer placement.
- Speaker's volume: Quieter speakers need the mic closer.
4. Positioning:
- Aim the mic slightly above the speaker's mouth, angled down.
- This helps avoid breath noise and plosives.
5. Off-axis rejection:
- Shotgun mics reject off-axis sound, so precise aiming is crucial.
6. Too close vs. too far:
- Too close can cause bass buildup (proximity effect).Too far can pick up more room noise and reverb.
7. Test and adjust:
- Always do a sound check and adjust based on the specific situation.
Remember, these are general guidelines. The best distance can vary based on the specific microphone model, the acoustic environment, and the desired sound quality.
Using 32-bit audio offers several advantages, particularly in professional audio production:
1. Dynamic range: 32-bit float provides a theoretical dynamic range of 1,528 dB, far exceeding human hearing capabilities and any real-world audio scenario.
2. Headroom: Virtually unlimited headroom, eliminating concerns about clipping during recording.
3. Noise floor: Extremely low noise floor, allowing for very quiet passages without introducing system noise.
4. Processing flexibility: Maintains higher precision during complex audio processing and mixing operations.
5. Future-proofing: Captures the highest possible quality, allowing for future use as playback systems improve.
6. Simplified workflow: Reduces the need for careful gain staging during recording, as levels can be adjusted later without quality loss.
7. Compatibility: Easy to convert to lower bit depths (like 24-bit or 16-bit) for final delivery without quality issues.
8. Error resilience: More resistant to cumulative errors from multiple processing stages.
9. Wide range of values: Can represent both very small and very large values accurately.
10. Non-destructive editing: Allows for extreme editing and processing without degrading the original signal quality.
While 32-bit audio files are larger and not all devices support playback, they're increasingly used in professional recording and post-production environments.
The main differences between a microphone input and a line-level input are:
1. Signal strength:
Microphone inputs are designed for weak signals, typically in the millivolt range.
Line-level inputs expect much stronger signals, usually around 1 volt.
2. Impedance:
Microphone inputs have a high impedance, often several kilohms.
Line-level inputs have a lower impedance, typically around 10 kilohms.
3. Preamplification:
Microphone inputs include a preamplifier to boost the weak signal.
Line-level inputs don't require additional amplification.
4. Phantom power:
Microphone inputs often provide phantom power for condenser mics.
Line-level inputs don't supply phantom power.
5. Connector types:
Microphone inputs commonly use XLR connectors.
Line-level inputs often use 1/4" TRS or RCA connectors.
6. Typical sources:
Microphone inputs are used for microphones and some instruments.
Line-level inputs are for devices like synthesizers, CD players, or audio interfaces.
Noise Reduction is a process or technique used in audio production to minimize unwanted background noise in recordings. Here's an overview:
1. Purpose: To improve audio quality by reducing or removing unwanted sounds.
2. Types of noise addressed:
- Background noise (e.g., air conditioning, traffic)
- Electrical noise (e.g., hum, hiss)
- Environmental noise (e.g., wind, room reverb)
3. Methods:
- Spectral subtraction
- Adaptive filtering
- Multi-band noise gating
- AI-based noise reduction
4. Application: Can be applied during recording or in post-production
5. Tools:
- Hardware units
- Software plugins
- Built-in features in DAWs (Digital Audio Workstations)
6. Considerations:
- Over-application can lead to artifacts or "hollow" sound
- Balance between noise reduction and preserving original audio quality
7. Common uses:
- Cleaning up dialogue in film/video production
- Improving quality of music recordings
- Enhancing archival audio
8. Limitations:
- Cannot completely eliminate noise without affecting desired audio
- Effectiveness varies based on type and amount of noise
9. Professional vs. consumer applications:
- Professional tools offer more control and better results
- Consumer-grade options are simpler but may be less effective
Sound Devices' "Noise Assist" is a valuable feature for audio professionals, particularly in field recording and production sound. Here are the main reasons to use it:
1. Real-time noise reduction: Reduces unwanted background noise during recording, not just in post-production.
2. Preserve audio quality: Designed to minimize artifacts and maintain the integrity of the primary audio.
3. Flexibility: Offers adjustable settings to tailor noise reduction to specific environments.
4. Time-saving: Reduces the need for extensive noise reduction in post-production.
5. Improved clarity: Enhances the intelligibility of dialogue and other important sounds.
6. Adaptability: Can adjust to changing noise profiles in dynamic environments.
7. Multiple channel support: Capable of processing multiple audio channels simultaneously.
8. Confidence in difficult locations: Allows recording in noisy environments that might otherwise be challenging.
9. Complementary to other techniques: Can be used alongside traditional noise reduction methods like proper mic placement.
10. Non-destructive: The original, unprocessed audio is typically recorded alongside the noise-reduced version.
"Noise Assist" is particularly useful for location sound recordists, documentary filmmakers, and other professionals who often work in unpredictable or noisy environments.
To connect an external microphone to a PTZ (Pan-Tilt-Zoom) camera, follow these general steps:
1. Check the camera's audio input: Most PTZ cameras have an audio input port, typically a 3.5mm jack or XLR connector.
2. Choose the right microphone: Select a microphone compatible with your camera's input type.
3. Use appropriate cables: Ensure you have the correct cable to connect your microphone to the camera's input.
4. Connect the microphone: Plug the microphone into the camera's audio input port.
5. Configure camera settings: Access the camera's menu or settings to enable external audio input if necessary.
6. Adjust audio levels: Fine-tune the audio input levels in the camera settings for optimal sound quality.
7. Test the setup: Record a test video to ensure the external microphone is working correctly.
The exact process may vary depending on your specific PTZ camera model and microphone type.
If your camera has a USB port, it may be possible to use a microphone with an XLR connector, even if your PTZ camera does not have an XLR port. Products such as the Maker Hart “Mic Power” can power the XLR mic using the power from the USB port. PTZ Optics has used this product successfully with their PTZ cameras.
Adobe Podcast is an AI-powered audio recording and enhancement tool. Here's an overview:
1. Purpose: Designed to simplify podcast creation and improve audio quality
2. Key features:
- AI-powered noise reduction
- Speech enhancement
- Automatic transcription
- Studio-quality recording
3. Functionality:
- Web-based application, accessible through browsers
- Allows recording directly in the browser
- Can enhance pre-recorded audio files
4. AI capabilities:
- Removes background noise
- Enhances voice clarity
- Levels out audio volume
5. Ease of use:
- User-friendly interface
- Designed for both beginners and professionals
6. Compatibility:
- Works with various audio file formats
- Integrates with other Adobe Creative Cloud apps
7. Effectiveness:
- Generally receives positive feedback for its noise reduction and voice enhancement
- Results can vary depending on original audio quality
8. Limitations:
- As with any AI tool, may occasionally produce artifacts or unnatural sound
- Primarily focused on voice enhancement, not ideal for music
8. Availability:
- Part of Adobe Creative Cloud suite
- Free version available with limited features
9. Use cases:
- Podcasting
- Video voiceovers
- Cleaning up interview recordings
As for whether it works, many users report significant improvements in their audio quality, especially in reducing background noise and enhancing speech clarity. However, like any tool, its effectiveness can vary based on the specific audio and use case.
Frequency response refers to how a device or system reproduces the range of audio frequencies it receives. Here's a breakdown of this important audio concept:
1. Definition: The measure of how accurately a device reproduces input signals across the audible frequency spectrum.
2. Frequency range: Typically measured from 20 Hz to 20 kHz, which is the general range of human hearing.
3. Graphical representation: Often shown as a graph with frequency on the x-axis and amplitude on the y-axis.
4. Ideal response: A flat frequency response, where all frequencies are reproduced at the same relative level.
5. Real-world responses: Most devices have some variation, with boosts or cuts at certain frequencies.
6. Importance: Crucial for determining the accuracy and quality of audio equipment.
7. Applications: Used to evaluate microphones, speakers, headphones, amplifiers, and other audio devices.
8. Measurement: Typically measured in decibels (dB) relative to a reference level.
9. Factors affecting response: Device design, components, and environmental conditions.
10. Interpretation: A device with a ±3 dB variation is generally considered to have a good frequency response.
11. Tailored responses: Some devices intentionally color the sound for creative or functional purposes.
Understanding frequency response is crucial for selecting appropriate audio equipment and achieving desired sound quality in recording, mixing, and playback scenarios.
Microphone sensitivity refers to how efficiently a microphone converts acoustic energy (sound waves) into electrical energy (audio signal). Here's a detailed explanation:
1. Definition:
- The measure of a microphone's output level relative to its input sound pressure level.
2. Measurement Units:
- Typically expressed in millivolts per Pascal (mV/Pa) or decibels relative to 1 volt per Pascal (dBV/Pa).
3. Typical values:
- Range from about -60 dBV/Pa to -30 dBV/Pa for common microphones.
- Higher numbers (less negative) indicate higher sensitivity.
4. Importance:
- Affects the microphone's ability to pick up quiet sounds and its overall output level.
5. High Sensitivity:
- Pros: Better for quiet sources, less amplification needed.
- Cons: May overload with loud sources.
6. Low Sensitivity:
- Pros: Better for loud sources, less likely to distort.
- Cons: May require more gain, potentially introducing noise.
7. Factors Affecting Sensitivity:
- Microphone type (condenser, dynamic, ribbon)Diaphragm size and design
- Internal electronics (for active microphones)
8. Relationship to SPL Handling:
- Generally, less sensitive mics can handle higher sound pressure levels (SPL).
9. Application Considerations:
- Choose higher sensitivity for distant or quiet sources.
- Choose lower sensitivity for close or loud sources.
10. Self-noise:
- More sensitive mics often have lower self-noise, important for recording quiet sources.
11. Gain Staging:
- Sensitivity affects how much preamplifier gain is needed, impacting overall signal-to-noise ratio.
Understanding microphone sensitivity is crucial for selecting the right microphone for specific recording situations and for proper gain staging in audio systems.
To prevent microphone feedback, you can employ several strategies:
1. Microphone placement:
- Keep microphones behind speakers
- Point microphones away from speakers
- Maintain adequate distance between mics and speakers
2. Use directional microphones:
- Cardioid or hypercardioid patterns reduce pickup from behind
3. Adjust EQ:
- Identify and reduce problematic frequencies
- Use a graphic EQ to cut narrow frequency bands
4. Proper gain staging:
- Keep input levels as low as possible while maintaining clarity
- Avoid excessive amplification
5. Speaker placement:
- Position speakers to project away from microphones
- Use monitor wedges angled towards performers
6. Use a feedback suppressor:
- Automatic devices that detect and notch out feedback frequencies
7. Room acoustics:
- Use acoustic treatment to reduce reflections
- Avoid hard, reflective surfaces near microphones
8. Digital signal processing:
- Utilize feedback elimination plugins in digital mixers
9. Proper monitor levels:
- Keep stage monitors at the minimum necessary volume
10. Microphone technique:
- Train speakers/singers to keep mics close to their mouths
- Avoid cupping the microphone
11. Use in-ear monitors:
- Reduces the need for loud stage monitors
12. Ring-out the system:
- Systematically increase gain and notch out frequencies before the event
13. Consider wireless systems:
- Can provide more flexibility in microphone and performer positioning
Remember, preventing feedback is often a combination of these techniques. The specific approach may vary depending on the venue, equipment, and performance requirements.
Gain staging is a crucial concept in audio recording and production. Here's an explanation of what it is and how it affects recording:
1. Definition:
- The process of setting optimal signal levels through each stage of an audio system.
2. Purpose:
- To maintain the best possible signal-to-noise ratio (SNR) throughout the signal chain.
3. Key stages:
- Microphone preamp
- Mixer channels
- Effects processors
- Analog-to-digital converters
- Digital audio workstation (DAW) levels
4. Optimal levels:
- Aim for signal peaks around -18 dBFS to -12 dBFS in digital systems
- In analog systems, aim for levels that occasionally hit 0 VU
5. Effects on recording:
- Proper gain staging ensures clean, noise-free recordings
- Improper staging can lead to noise, distortion, or lack of headroom
6. Avoiding noise:
- Set gain high enough to keep the signal well above the noise floor
7. Preventing distortion:
- Keep levels below the point of clipping or overload
8. Dynamic range:
- Good gain staging preserves the full dynamic range of the source
9. Consistency:
- Helps maintain consistent levels across multiple tracks and mixing stages
10. Headroom:
- Proper staging leaves adequate headroom for mixing and mastering
11. Digital vs. analog:
- Digital systems are less forgiving of improper gain staging than analog
12. Cumulative effect:
- Small gains or cuts at each stage can add up significantly
13. Metering:
- Use proper metering tools to accurately monitor levels at each stage
Proper gain staging is fundamental to achieving high-quality recordings. It affects every aspect of the signal chain and can make the difference between a clean, professional-sounding recording and one plagued by noise or distortion.
Click here for our more complete blogpost on the subject.
To reduce background noise with a microphone, you can employ several techniques:
1. Choose the right microphone:
- Use directional microphones (e.g., cardioid, supercardioid) to focus on the sound source
- Consider using dynamic mics in noisy environments
2. Proper microphone placement:
- Position the mic as close to the sound source as possible
- Angle the mic away from noise sources
3. Use a pop filter or windscreen:
- Reduces wind noise and plosives
4. Adjust input gain:
- Set the gain as low as possible while still capturing a strong signal
5. Use a noise gate:
- Set a threshold to cut out low-level background noise
6. Apply EQ:
- Identify and reduce frequencies where noise is most prominent
7. Use acoustic treatments:
- Add sound-absorbing materials to reduce room reflections
8. Record in a quiet environment:
- Choose a location with minimal ambient noise
9. Use a reflection filter:
- Place behind the microphone to reduce room reflections
10. Consider software noise reduction:
- Use plugins or built-in DAW tools for post-processing noise reduction
11. Try a multi-microphone technique:
- Use multiple mics and phase cancellation to reduce ambient noise
12. Use a lavalier or headset mic:
- Can be positioned very close to the sound source
13. Implement proper mic technique:
- Instruct speakers to stay close to the mic
14. Use a noise-canceling microphone:
- Some mics have built-in noise cancellation technology
15. Consider recording in mono:
- Can help focus on the primary sound source
Remember, the effectiveness of these methods can vary depending on the specific situation and type of background noise. Often, a combination of techniques yields the best results. Click here for our more complete blogpost on the subject.
To set levels and avoid clipping when recording, follow these steps:
1. Understand Clipping:
- Clipping occurs when the audio signal is too strong for the recording equipment, causing distortion. This happens when the signal exceeds the maximum level that the equipment can handle.
2. Use Proper Equipment:
- Microphone: Choose a good-quality microphone suitable for your recording needs.
- Audio Interface: Use an audio interface with preamps to control input levels.
3. Set Up Your Equipment:
- Microphone Placement: Position the microphone correctly to capture the desired sound while avoiding excessive loudness.
- Audio Interface Settings: Adjust the gain control on your audio interface.
4. Monitor Input Levels:
- Software Meters: Use the meters in your recording software (DAW) to monitor input levels.
- Peak Indicators: Ensure that peak indicators (usually marked in red) do not light up, indicating clipping.
5. Adjust Gain Levels:
- Start Low: Begin with a lower gain setting on your audio interface or preamp.
- Test Recording: Perform a test recording while speaking or playing at the loudest expected level.
- Adjust Gradually: Increase the gain gradually until you achieve a strong signal without clipping.
6. Use a Limiter:
- Limiter Plugin: Apply a limiter plugin in your DAW to prevent peaks from exceeding a certain level.
- Threshold Setting: Set the threshold just below the clipping point.
7. Record with Headroom:
- Target Levels: Aim for recording levels between -12 dB and -6 dB to ensure enough headroom.
- Consistent Levels: Keep the levels consistent throughout the recording session.
8. Monitor with Headphones:
- Direct Monitoring: Use direct monitoring to hear the input signal in real-time without latency.
- Check for Distortion: Listen for any signs of distortion or clipping and adjust accordingly.
9. Post-Processing:
- Normalize Audio: After recording, normalize the audio to standardize the volume levels.
- Compression: Use compression to even out dynamic ranges without causing clipping.
10. Regularly Check Levels:
- Continuous Monitoring: Continuously monitor input levels during the recording session.
- Adjust as Needed: Make real-time adjustments if levels change unexpectedly.
By following these steps, you can ensure that your recordings are clean, clear, and free from clipping.
Click here for our more complete blogpost on the subject.
The difference between mono and stereo recording primarily lies in the way audio is captured and reproduced:
Mono Recording:
1. Single Channel: Mono (monophonic) recording uses a single audio channel.
2. Sound Source: All sound sources are mixed together into one track.
3. Playback: The same audio signal is sent to both the left and right speakers or headphones.
4. Spatial Perception: Mono provides a single point of sound without any sense of spatial dimension or directionality.
5. Applications: Often used for voice recordings, podcasts, telephone communications, and some musical recordings where spatial information is not critical.
Stereo Recording:
1. Two Channels: Stereo (stereophonic) recording uses two separate audio channels.
2. Sound Source: Captures audio from two different positions (left and right), providing a more immersive experience.
3. Playback: Different audio signals are sent to the left and right speakers or headphones.
4. Spatial Perception: Stereo provides a sense of space and directionality, allowing listeners to perceive the location of different sound sources within the stereo field.
5. Applications: Commonly used in music production, film soundtracks, video games, and any application where a realistic sound stage is desired.
Key Differences:
1. Audio Channels:
- Mono: One channel.
- Stereo: Two channels (left and right).
2. Sound Imaging:
- Mono: Sound is centered and lacks directional cues.
- Stereo: Provides spatial cues, giving the impression of sound coming from different directions.
3. Recording Technique:
- Mono: Typically uses one microphone.
- Stereo: Often uses two microphones placed in a specific configuration (e.g., X/Y, A/B, ORTF) to capture the stereo field.
4. File Size:
- Mono: Smaller file size due to a single audio track.
- Stereo: Larger file size because it contains two audio tracks.
5. Usage Context:
- Mono: Suitable for voice-heavy content or where spatial dimension is not necessary.
- Stereo: Ideal for music, movies, and immersive audio experiences.
By understanding these differences, you can choose the appropriate recording method based on your specific needs and the desired listening experience.
Syncing audio with video during recording involves ensuring that the audio track aligns perfectly with the video track. Here are the steps to achieve this:
Use a Clapboard: Clap it at the start for a visual and audio sync point.
Timecode: Sync timecodes on both camera and audio recorder.
Reference Audio: Record a reference track with the camera's mic.
Sync in Software: Import files to editing software and use auto-sync or manually align waveforms.
Step-by-Step Process:
1. Preparation:
- Set up your camera and audio recording device.
- If using a clapboard, have it ready.
2. Start Recording:
- Begin recording audio on your audio device.
- Start recording video on your camera.
3. Clapboard (if used):
- Hold the clapboard in front of the camera.
- Clap it to create a sharp sound and a visible marker.
4. Recording Session:
- Proceed with your recording session.
- Ensure minimal audio interference and clear audio capture.
5. Import Files into Editing Software:
- Transfer the video files from your camera to your computer.
- Transfer the audio files from your audio recording device to your computer.
6. Syncing Audio and Video:
Automatic Sync:
- Use the auto-sync feature in your editing software.
- Select the video clip and the external audio clip.
- Right-click and choose "Synchronize" (or the equivalent in your software).
- Sync by "Audio" or "Timecode."
Manual Sync:
- Align the audio waveforms manually.
- Zoom into the timeline to see the waveforms.
- Match the waveforms of the reference audio with the external audio.
- Adjust until the audio aligns perfectly with the video.
7. Final Check:
- Play back the synced clips to ensure proper alignment.
- Make any fine adjustments if necessary.
By following these steps, you can effectively sync audio with video during recording, ensuring a seamless and professional final product.
Syncing audio with video during recording involves ensuring that the audio track aligns perfectly with the video track. Here are the steps to achieve this:
An audio interface is a device that connects your microphones, instruments, and other audio sources to your computer, converting analog signals to digital data and vice versa. Here's why you need one for recording:
1. Improved Sound Quality: Better preamps and high-resolution audio.
2. Multiple Inputs/Outputs: Connect multiple sources and professional monitors.
3. Low Latency Monitoring: Real-time monitoring with minimal delay.
4. Phantom Power: Provides 48V power for condenser microphones.
5. MIDI Connectivity: Connect MIDI controllers and instruments.
6. Enhanced Control: Software integration for adjusting settings and routing audio.
An audio interface significantly enhances your recording quality and flexibility compared to a built-in sound card.
Room treatment involves modifying a room to improve its acoustics for recording and mixing audio. It includes using materials and devices to manage sound reflections, absorption, and diffusion. Here's how it affects recording quality:
1. Reduces Echo and Reverb: Minimizes unwanted reflections that can cause echo and reverb, resulting in cleaner recordings.
2. Controls Bass: Bass traps absorb low-frequency sounds, preventing them from muddying the recording.
3. Enhances Clarity: Absorption panels reduce mid and high-frequency reflections, making vocals and instruments sound clearer.
4. Balances Sound: Diffusers scatter sound waves evenly, creating a balanced acoustic environment.
Proper room treatment leads to more accurate recordings and mixes by providing a controlled listening environment.
Lower frequencies are absorbed more than higher frequencies. That is a fact that cannot be ignored. However, the loss of low-end response for parabolic mics is not nearly as bad as some would have you believe. We have a short video that was shot during the setup of an outdoor music event. The low frequencies of the music (being used to set up the audio system) were picked up quite well by a 9-inch parabolic. In addition, nearly every mixing board and video editing software package will allow you to add base and reduce high-end frequencies to equalize the audio input from the parabolic mic to suit your taste.
Most audio experts, including people we respect very highly, would tell you that a 9-inch parabolic will not capture (amplify) any audio below 2,000 or 3,000 Hertz. The white papers and formulas that we have found in our research would confirm this belief. However, if this were true, very little of the human voice would be picked up by a 9-inch parabolic, and the low frequencies of bass would certainly be below this threshold. Our second sample video demonstrates that this is not the case, as it shows how well the small parabolic mic captured the low-frequency sounds generated by WWII aircraft.
Our theory is that most of the research on parabolic reflectors relies on the properties of electromagnetic waves, particularly the wavelength of those waves. These waves apply to satellite dishes or antennas but not to audio. A parabolic microphone captures pressure waves, not electromagnetic waves, so the wavelength is not relevant in the same way as it is to electromagnetic (radio) waves.
As mentioned above, we cannot ignore the way that various frequencies react differently when reflecting off a surface. Parabolic collectors (microphones) do a better job of amplifying higher frequencies than lower frequencies. In order to provide a more natural sound, we have joined forces with Countryman Associates to create a microphone that is specifically equalized to match the acoustic characteristics of the KLOVER MiK 09 parabolic collector. The equalization also works exceptionally well with the KLOVER MiK 16, giving each a flatter, more natural sound than when used with a standard lavaliere microphone element. Find out more about our Equalized Mic here.
There are many factors involved. The attenuation of sound, the natural loss of energy as it passes through the air, is affected by frequency, temperature, and humidity. In addition, the amount of energy reflected or absorbed by the surface between the sound source and the microphone also affects the amount of sound energy that reaches the microphone. Another factor that has to be considered is the “signal-to-noise ratio.” In other words, how loud is the audio source you want to capture compared to the ambient noise you don’t want to capture? A parabolic microphone will amplify all sound energy (of equal frequencies) by the same factor. So you may be able to capture a conversation from 500 feet in a nearly silent environment, but it won’t be possible if the conversation is taking place next to a highway. The parabolic will not be able to separate the sound of the human voices from the road noise.
Considering all those factors, we have captured conversation from more than 500 feet in quiet situations (relatively empty football stadium) using our 26-inch parabolic. In similar cases, we have captured conversations from more than 250 feet with our 16-inch parabolic. In the quiet environment of a wedding service, we have had customers capture wedding vows from 50 feet away. If you are interested in capturing high-frequency sounds, such as bird noises, the range will be even greater.
Please see the Frequently Asked Questions tab at the bottom of the individual product page. We do, however, have a few general guidelines:
-
We suggest using a water-resistant microphone, such as the Countryman B3, if your parabolic mic will be used outdoors.
-
Lapel microphones tend to be “bright” or slightly biased toward high frequencies. If weight is not an issue, a small diaphragm condenser (pencil) microphone will usually provide a flatter audio curve.
-
Microphones with a higher sensitivity will provide greater range.
-
A microphone with minimal internal electronic noise (self-noise) is highly recommended.
We do not recommend using a parabolic microphone for recording music. As mentioned throughout our website, parabolic microphones do have a bias toward high frequencies, so the music will not sound “pure.”
Yes, to an extent. We’ve been pleasantly surprised by how much conversation can be captured when the speaker is not facing directly toward the parabolic. While the maximum sound energy is available when the speaker is facing the parabolic collector, it (pressure waves) radiates out from the side of the speaker’s head as well as directly forward. In addition, the sound energy is often reflected off a nearby person or object toward the parabolic.
We’ve designed our parabolic mics to allow users to use whatever microphone element they might like, so we do not include the electronics with our parabolic mics. We believe this provides our customers with the maximum performance and flexibility. We do, however, offer kits/packages that bundle the parabolic microphone with the required electronics.
The simple answer is that the pickup pattern looks like a cone. The best audio will be captured within a cone that extends 10 to 15 degrees on either side of the axis of the dish. This provides a circular area with a diameter approximately half the distance of the dish. In other words, at 100 feet, you will have a pickup pattern that is a circle about 50 feet in diameter. However, as the frequency increases, the range will increase, and the pattern will become smaller. Please refer to our test curves under the “Test Results” tab at the bottom of the individual product pages.
The most common reason for not receiving any signal from the parabolic is not providing the proper power to the microphone element. If you are using a microphone with an XLR connector, check if the microphone requires “phantom power .”If your microphone requires “phantom power,” verify that the device you are plugging your microphone into is providing the required “phantom power” voltage (usually between 12 and 48 volts). If you are using a microphone with a 3.5mm TRS connector, check if the microphone requires “plug-in power .”If your microphone requires “plug-in power,” verify that the device you are plugging your microphone into is providing the required “plug-in power” voltage (usually between 3 and 10 volts).
Yes and No. Because parabolic microphones are so sensitive, feedback is a huge challenge. Great care must be taken with the location of the parabolic mic relative to the speaker.Mounting the parabolic at an angle to any flat surfaces, such as walls, will help to reduce this feedback.
No. Despite what you may have seen on television or in the movies, that’s not possible. You must have a clear path between your subject and the parabolic to capture the sound energy.
Yes and No. While our parabolic microphones will probably capture audio from your neighbor’s yard, you will be taking a huge legal risk if you do so. If you record a private conversation, you are in danger of being accused of eavesdropping on the conversation and wiretapping. Our parabolic mics are intended for broadcast, sound reinforcement, and law enforcement/security applications.
While parabolic microphones are not typically used for music recording, they can be used in certain niche situations. Here's an overview:
1. Primary purpose: Parabolic mics are designed for long-distance sound capture, not music recording.
2. Potential music applications:
- Capturing ambient sounds or crowd noise at concerts
- Recording unique sound effects for electronic or experimental music
- Isolating specific instruments in a large ensemble from a distance
3. Limitations for music:
- Can color the sound unnaturally
- Lack of proximity effect for warmth in close-miking situations
4. Sound characteristics:
- Highly directional
- Can pick up sounds from long distances
- May have a "thin" or "tinny" quality for music
5. Comparison to traditional music mics:
- Less accurate frequency response than studio condensers or dynamics
- Much more directional than most music microphones
6. Practical challenges:
- Large size makes placement difficult in typical recording setups
- Not designed for close-miking techniques common in music recording
7. Possible creative uses:
- Capturing unique reverberations or echoes in large spaces
- Recording environmental sounds to layer into music productions
8. Better alternatives for music:
- Condenser microphones for studio recording
- Dynamic microphones for live performances
- Shotgun microphones if high directionality is needed
While parabolic microphones can be used creatively in music production, they are generally not the first choice for standard music recording. Their unique properties might be useful for specific artistic effects or unconventional recording techniques.
While parabolic microphones are not typically used for music recording, they can be used in certain niche situations. Here's an overview:
Room treatment involves modifying a room to improve its acoustics for recording and mixing audio. It includes using materials and devices to manage sound reflections, absorption, and diffusion. Here's how it affects recording quality:
1. Reduces Echo and Reverb: Minimizes unwanted reflections that can cause echo and reverb, resulting in cleaner recordings.
2. Controls Bass: Bass traps absorb low-frequency sounds, preventing them from muddying the recording.
3. Enhances Clarity: Absorption panels reduce mid and high-frequency reflections, making vocals and instruments sound clearer.
4. Balances Sound: Diffusers scatter sound waves evenly, creating a balanced acoustic environment.
Proper room treatment leads to more accurate recordings and mixes by providing a controlled listening environment.
The difference between a shotgun microphone and a parabolic microphone primarily lies in their design and usage:
Shotgun Microphone:
1. Design:
- Long, Cylindrical Shape: Resembles a shotgun barrel.
- Interference Tube: Uses an interference tube to enhance directionality.
2. Pickup Pattern:
- Supercardioid or Hypercardioid: Directional, capturing sound from the front while attenuating sound from the sides and rear.
3. Usage:
- Close to Medium Distance: Ideal for capturing sound from a specific direction at relatively close to medium distances.
4. Applications:
- Film and TV production, interviews, live events.
Parabolic Microphone:
1. Design:
- Parabolic Dish: Uses a parabolic reflector to focus sound waves onto a central microphone.
2. Pickup Pattern:
- Highly Directional: The pickup pattern can be thought of as being conical. The more focused pickup pattern makes it possible to capture sound from a specific area at a distance.
3. Usage:
- Long Distance: Ideal for capturing sounds with high clarity from distances beyond the reach of standard microphones.
- Applications: Wildlife recording, sports events, surveillance.
Key Differences:
1. Distance:
- Shotgun Microphone: Effective at close to medium distances.
- Parabolic Microphone: Effective at medium to long distances.
2. Design and Mechanism:
- Shotgun Microphone: Uses an interference tube to attenuate sounds coming from the side.
- Parabolic Microphone: Uses a parabolic dish to amplify sound directly in front of the collector dish.
3. Field of Use:
- Shotgun Microphone: Versatile for various close-range applications.
- Parabolic Microphone: Typically used for capturing audio from a distance or where a more focused pickup pattern is required.
Understanding these differences helps in choosing the right microphone based on the recording needs and environment.
When buying a parabolic microphone, consider these key features:
1. Parabolic Dish Size:
- Larger Dish: Provides greater focus and pickup range.
- Smaller Dish: More portable but with reduced range. Refer to our blogpost “How Big Does a Parabolic Mic Need To Be?” for more information.
2. Microphone Quality / Flexibility:
- Sensitivity: Higher sensitivity for capturing distant sounds clearly.
- Frequency Response: Wide frequency range for capturing a broad spectrum of sound.
- Flexibility: A built-in microphone eliminates the ability to use microphones of different quality levels.
3. Pickup Pattern:
- Highly Directional: Ensures focused sound capture from the targeted area. A deeper collector dish increases its directionality.
4. Build Quality:
- Durability: Sturdy construction to withstand outdoor conditions.
- Weatherproofing: Protection of microphone element and electronics against moisture and dust.
5. Mounting and Handling:
- Handle: Comfortable and ergonomically designed for extended use.
- Mounting Options: Versatility for different recording setups.
6. Weight and Portability:
- Lightweight: Easier to carry and handle, especially for field recording. The flexibility of foldable collector dishes reduces the dish’s amplification.
7. Wind Protection:
- Windshield: Included or compatible with windshields to reduce wind noise.
8. Compatibility:
- Audio Interface: Ensure compatibility with your recording equipment and interfaces.
9. Price and Budget:
- Cost: Balance between budget and desired features.
These features will help you choose a parabolic microphone that best fits your recording needs and environment.
Parabolic microphones can capture audio effectively in windy conditions, but they are not immune to wind noise. Here’s how they perform and how to improve their use in windy environments:
How They Work in Windy Conditions:
1. Directional Focus: The parabolic dish helps to focus sound from the front and reject noise from the sides and rear, including some wind noise.
2. Wind Resistance: The dish itself does not completely prevent wind from affecting the microphone, but the collector dish does deflect the wind away from the microphone element in many situations. Many customers comment that the wind noise of our parabolic microphones is much less than the wind noise of a shotgun mic.
Tips for Improving Performance in Windy Conditions:
1. Use a Windshield:
- Foam Windshield: Reduces light wind noise.
- Furry Windscreen (Dead Cat): Provides better wind protection by covering the microphone and reducing wind noise significantly.
2. Avoid Direct Wind:
- Positioning: Place the microphone in a location shielded from strong winds if possible.
With proper wind protection and positioning, parabolic microphones can still deliver clear audio even in challenging conditions.
Various types of microphones can be used with a parabolic dish, each offering different advantages based on the recording needs. Here are the main types:
1. Style
A. Lavalier (Lapel) Microphones:
- Characteristics: Small
- Advantages: Light weight
- Disadvantages: Many lapels are bright meaning the emphasize high frequencies. This accentuates the high frequency bias of parabolic microphones.
B. Small-Diaphragm Condenser Microphones
- Characteristics: Flatter frequency response than lavaliere mics.
- Advantages: Offers excellent detail and clarity, often used in professional setups.
- Disadvantages: Larger, and heavier.
2. Construction
A. Dynamic Microphones:
- Characteristics: Robust and less sensitive to ambient noise.
- Advantages: Durable and can handle high sound pressure levels. Suitable for loud environments.
B. Condenser Microphones:
- Characteristics: Sensitive and accurate, requiring phantom power.
- Advantages: Provides high-quality sound capture with a wide frequency response. Useful for capturing detailed audio.
3. Pickup Pattern
A. Omnidirectional Microphones:
- Characteristics: Captures sound equally from all directions. Deeper parabolic collectors are designed for omnidirectional microphones.
- Advantages: Captures reflected sound from the entire collector dish.
- Disadvantages: Collects more ambient noise.
B. Cardiod Microphones:
- Characteristics: Captures sound with higher sensitivity toward the front of the microphone. The sensitivity declines as you move away from center axis of the mic.
- Advantages: Captures less ambient sound coming from behind the mic as it faces the collector dish.
- Disadvantages: The outer portions of a deeper dish will not be captured at the mics full sensitivity. This reduces the overall amplification of the parabolic mic.
C. Super Cardiod and Hyper Cardioid Microphones (Shotgun Microphones):
- Characteristics: Uses an interference tube to attenuate sounds coming from the side.
- Advantages: NONE.
- Disadvantages: All but the very center of the collector dish will not be captured due to the shotgun mic’s interference tube. This reduces the overall amplification of the parabolic mic to nearly zero. Please refer to our blogpost on the subject.
Ensure that the microphone you choose fits the dish and meets your specific recording needs for optimal performance.
Yes, parabolic microphones are designed to capture sound from specific directions accurately. Here’s how they achieve this:
How Parabolic Microphones Capture Sound:
1. Parabolic Dish:
- Function: The parabolic shape of the dish focuses sound waves from a specific direction onto the microphone.
- Directional Focus: This design amplifies and directs sound coming from the front while reducing noise from the sides and rear.
2. Microphone Placement:
- Center of the Dish: The microphone is positioned at the focal point of the dish, where the sound waves converge.
- Precision: The dish’s shape ensures that sounds from the targeted area are captured more clearly and with greater focus.
3. High Gain and Sensitivity:
- Amplification: The dish enhances the sensitivity of the microphone to distant sounds.
- Clarity: This allows the microphone to pick up specific sounds with greater clarity and detail compared to other types of microphones.
Key Advantages:
1. Long-Distance Capture: Effective for capturing distant sounds with precision.
2. Minimized Background Noise: Focuses on the desired sound source while reducing ambient noise.
Parabolic microphones are ideal for applications like wildlife recording, sports events, and surveillance, where capturing specific sounds from a distance is crucial.
Parabolic microphones are used in various fields where capturing specific, distant sounds is crucial. Here are some real-world examples:
1. Wildlife Recording:
- Purpose: Capturing animal sounds in their natural habitat without disturbing them or placing the recordist in danger.
- Example: Recording bird calls, animal behaviors, and other wildlife sounds for research or documentaries.
2. Sports Events:
- Purpose: Capturing on-field sounds from a distance to make the broadcast coverage more immersive.
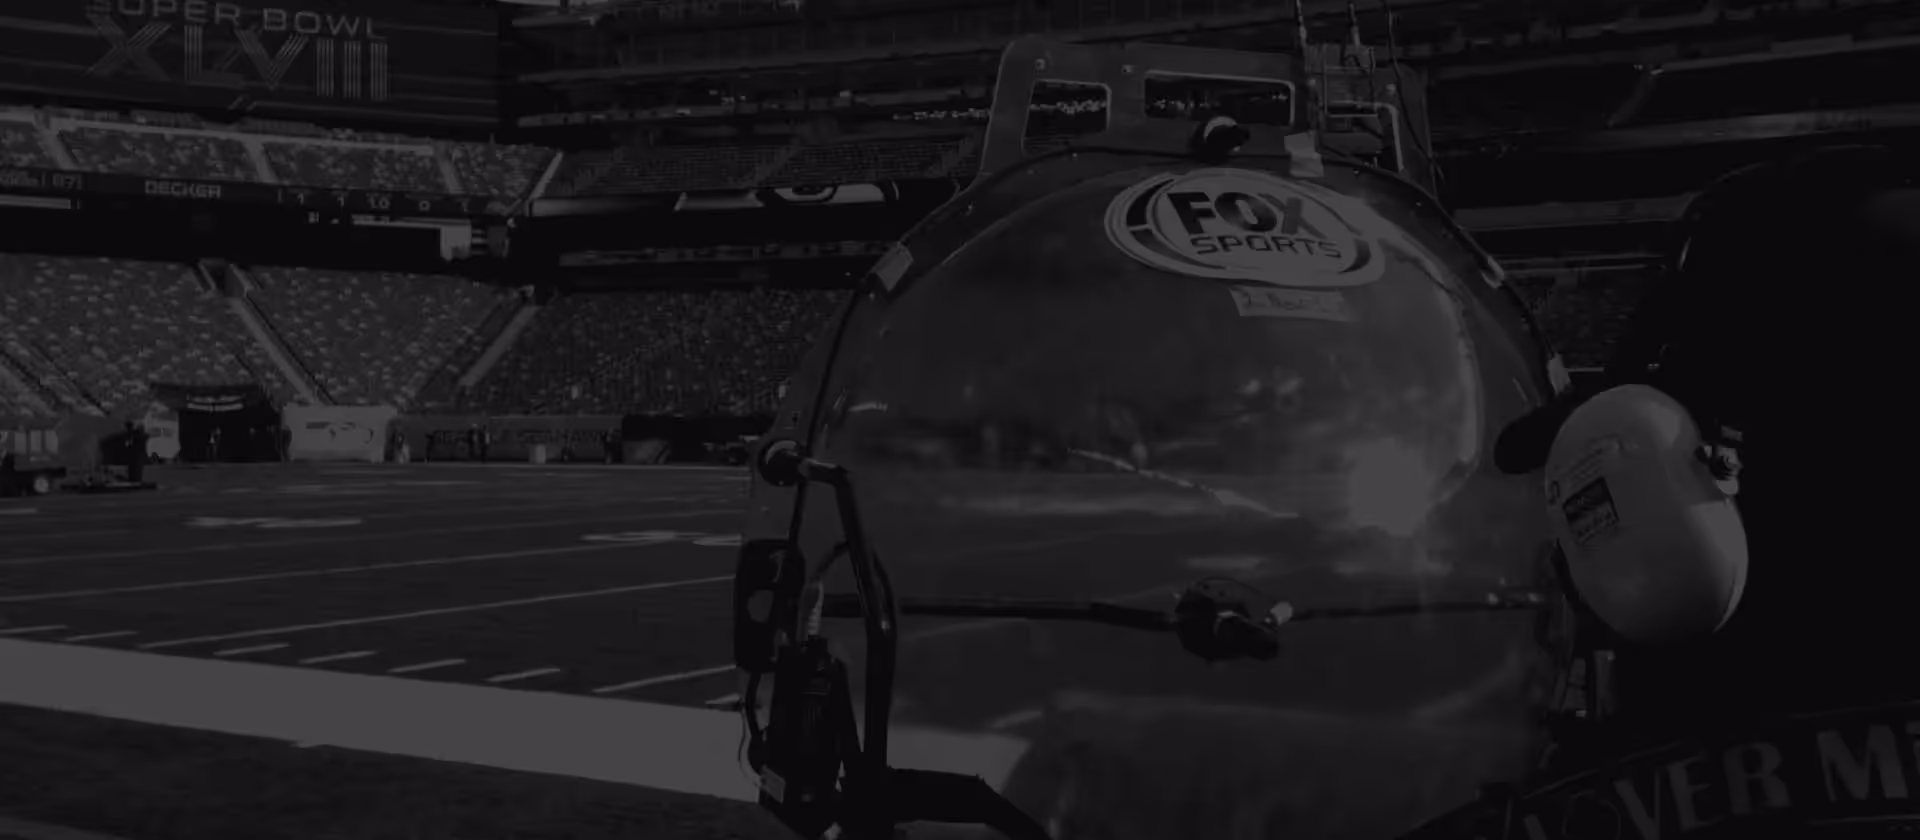
- Example: Used in sports broadcasting to capture player interactions, player collistions, sounds of the ball being struck, and other field sounds.
3. Surveillance and Security:
- Purpose: Monitoring and recording conversations or sounds from a distance for security purposes.
- Example: Law enforcement or security agencies use parabolic microphones for surveillance operations and crisis negotiations.
4. Film and Television Production:
- Purpose: Capturing distant or specific sound effects and dialogue on location.
- Example: Used in film production to record background sounds or dialogue from a distance without interrupting the scene. Small parabolic mics are used often for documentary type interviews.
5. Nature and Environment Studies:
- Purpose: Monitoring and studying environmental sounds for research.
- Example: Recording the impact of environmental changes on animal vocalizations or natural soundscapes.
6. Sports Coaching and Analysis:
- Purpose: Recording player communication and field sounds for training and analysis.
- Example: New England Patriot coaches use a KLOVER MiK parabolic microphones to review game tactics and player interactions during practice.
7. Streaming of Meetings / Classes / Press Conferences:
- Purpose: Capturing audience comments or questions during online meetings, classes, or press conferences.
- Example: The Philladelpia Eagles use a KLOVER MiK 16 to capture reporter questions during press conferences. Another example is the University of Texas using a KLOVER MiK to capture student questions from a remote location to the lecturer back on campus.
8. Mechanical Noise / Leak Detection
- Purpose: Monitoring and locating mechanical noises such as arcing, bearing noises, air leaks, or vehicle brake noises.
- Example: Industrial maintenance technicians using the KLOVER MiK to locate air leakes within a large industrial complex.
9. Search and Rescue
- Purpose: Locating victims lost with in a wilderness area by triangulating on the victims calls for help. Parabolic microphones are also invaluable for locating victims in rubble or collapsed buildings.
- Example: Santa Clara County Sheriff’s Search & Rescue Team was able to locate calls from over a mile when conducting tests of the KLOVER MiK 26.
These applications highlight the versatility of parabolic microphones in capturing clear, focused audio from specific directions across various fields.
Klover Products Inc. Limited Warranty Policy warrants all products to be free from defects in materials and workmanship for one year from the date of purchase unless otherwise stated.
If your KLOVER MiK doesn’t provide the great audio you expect, return it within 30 days for a full refund. The product must be in like-new condition to qualify for a full refund.
Please see full details on our “Terms & Conditions” page.
Yes. A list of dealers is on our “Dealer and Rentals” page.
Yes. A list of rental locations is on our “Dealer and Rentals” page.
Typical order processing times are detailed at the bottom of the “Cart” and “Checkout” pages.
The estimated delivery for the available shipment methods is listed on the “Cart” and “Checkout” pages. These estimates do not include customs clearance for international shipments. Typical order processing times are also detailed at the bottom of the “Cart” and “Checkout” pages.
Yes. While we have a dealer network (listed on our “Dealer and Rentals ” page), we can ship directly to our customers. The shipping cost quoted on our “Cart” and “Checkout” pages does not include any broker fees, import duties, tariffs, etc., for international shipments. The customer is responsible for all such costs.
Can Your Mic Reach As Far As Your Lens?